Sunday, May 17, 2015

5/14 (Lenz's Law, Faraday)

Lab Day 5/14/15: Magnetic flux, Lenz Law, Faraday

Purpose: To apply Lenz's law and Faraday's Law to magnetic fields and explore the idea of induction. 

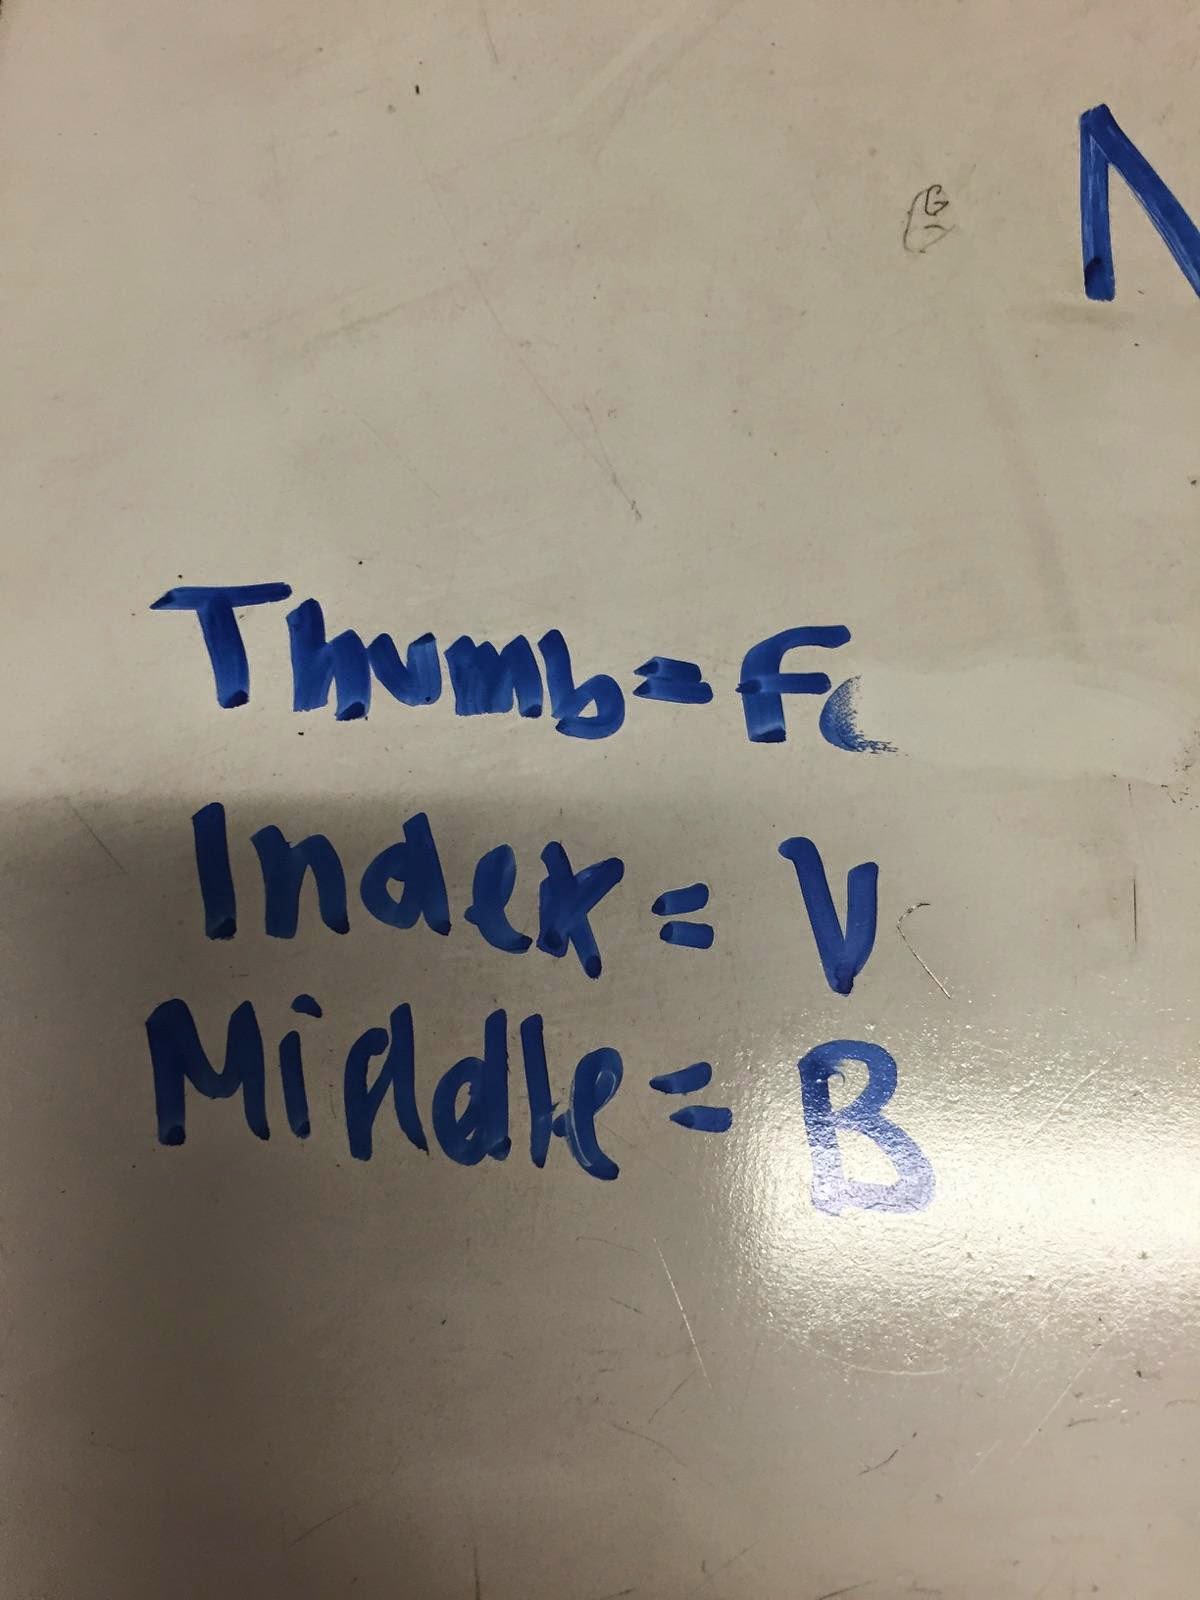
At the beginning of class, we were given two lines that have a current, a magnetic field, and a magnetic force on each. The current was predicted to go upward when the magnetic field points out of the board. When the magnetic field goes into the board on the right line, the current also goes upward using the right hand rule. Once again, force is equal to the current, length of the wire times the magnetic field. The magnetic dipole moment is used to find the magnetic field of an infinitely long wire.

Professor mason then performed the experiment by switching on the power supply causing an alternating current in the two parallel lines. There are in fact no net forces acting as there due to the alternating current. The graph created by logger pro below shows magnetic field in respect to time where two cycles of B is observed in which we can interpret the magnetic field oscillations caused by the north and south poles by applying Faraday's law.

Magnetic Field at the Center of a current loop
We found the proportionality of loops and magnetic fields by measuring the magnetic field when applying different number of loops N to it. In this experiment, we initially turned on the power which supplied a current to measure the magnetic field change due to one loop. Next, we measured the magnetic field as we increased the coiled number of loops of the insulated wire. The ammeter was used to measure the current through the wire which displayed measurements in the graph below connected to logger pro.
As a result, the magnetic field is proportional to the number of loops and the current. Therefore, the more loops, the larger the magnetic field when B is proportional to NI. 

Given the surface area ab, we can find the magnetic flux through a surface. It is seen that when the magnetic field is parallel to the surface area, the magnetic flux is zero. When the magnetic field is perpendicular to the area, we see that magnetic flux=BA=Bab.
Next we take a look at how to create a current in a coil of a wire using magnetic fields. In the experiment above, Prof. Mason used a bar magnet and galvanometer and allowed the magnet to go back and forth causing movement (changing magnetic fields) which stimulates a current seen in the movement of the meter through induction. As he stops in the center of the coil there is no change in the meter. 
There are four ways to maximize the current. If we want to maximize the current on an induced EMF we can add more loops on the coil, have a bigger loop by increasing the area, use a bigger magnet, and also move the magnet faster. 
Major points:
  (1)currents can be induced in a conductor(coiled wire) in the presence of a changing magnetic field 

Lenz's law is explored in this experiment.
In the left picture, when the metal is placed on top of the magnet, the light bulb lights up. The picture to the right shows a thin silver loop of copper of aluminum that is placed on top of the metal in which it floats when he turns on the electricity. However when this metal is cut, it would not suspend anymore.

When the north pole of the magnet is going toward a loop, the flux increases and an upward secondary magnetic field is created causing a counterclockwise current. The changing flux created by the magnetic field created by the induced emf causes the the loop to float due to the force upward.


In this part, when we place two metals inside with one made of plastic and one made of aluminum at the same time. As a result the aluminum fell much slower than the plastic.


The reason for the magnet moving slower is because there exists a magnetic field that generates a magnetic force upward. The induced current generates a magnetic field which then creates a force that opposes the induced EMF causing it to move slower.
Mathematical Representation of Faraday's Law
The picture above derives the emf and flux. We get B=B0sinwt where we can see the coil of wire with N loops and radius R, and when placed perpendicular to B a uniform magnetic field, can be identified with factors of angular and time sinusoidally. The electromotive force in the pickup coil is derived. 
Then we look at the electromotive force in respect to time in comparison to the B vs time graph. There is a phase shift seen from the original graph of magnetic field.
Conclusion: Today we applied Lenz's Law and Faraday's Law to see how we could induce a current using magnetic fields. We were able to come up with a mathematical derivations of these concepts to find that an EMF and flux explains the relationship between the two. 


5/12 (Magnetism,motors,charges)

Lab Day 5/12/15: Magnetism/Motors

Purpose: We will look at how a magnetic field can generate a torque and how this can be used in electric motors.

We began class by looking at an ordinary pin and a magnetized pin. We found that the pin is made up of many bar magnets distributed randomly with one end of the pin south and the other pole north. However, when the pin is magnetized the magnets would align itself so that the north would all be pointing in one direction and south would all be pointing in the other direction.

We found that we can also demagnetize the magnetized pin by heating it and like thor hit it with a hammer and this is shown in the picture.
Rectangular Current Loop
An example was given where we calculated the torque on a rectangular current loop. The equations of force from the previous lesson was derived where we could it apply it to the torque equation which is substituted below to find the net torque symbolically.

Next, the current loop in the magnetic field can generate a torque caused by the forces on its sides. The magnetic dipole moment is derived in the whiteboard below which allowed us to calculate the torque on the loop.
We worked on another problem that involved the torque on a 50 loop coil with a radius 1.00m. The calculations are performed below using the torque equation we found previously.
We can use the right hand rule for torque.
Inside an Electric Motor
We start by looking at a two-pole DC electric motor where it has 6 basic parts. The motor has two magnets. The armature is the electromagnet, and the field magnet is the permanent magnet.
We examined the things that would most likely break in a motor.
The video demonstrates a motor that uses the torque exerted on a current in a magnetic field which allows it to convert into mechanical energy to allow it to spin. In an electric motor, as the half-turn motion is done, the electromagnet flips, which causes the electric motor to spin freely. We developed a motor by using a coil, wire, magnetic metal plates, and batteries.


Saint-Louis style motor that has a wire-wrapped iron core on an axis spindle. The ends are connected to a split-ring commutator.

The Magnetic field near a current-carrying wire
We look at the magnetic field along a straight conductor that carries a current. We apply Oersted's observations to analyze the magnetic field lines that are perpendicular to the wire.
We derived the magnetic field formula using the magnetic dipole moment, the charge q, v, r knowing that Idl is equal to qV.
Superposition of Magnetic Fields
This board shows the superposition of the magnetic field when they are all in the same direction. They would cancel out if they were going in different directions.

Conclusion:
We learned that torque is generated in a current loop in a magnetic field due to forces on the sides. We came up with multiple equations of torque and magnetic dipole moment which allow us to calculate the net torque and rotation using the right hand rule. We were also introduced to motors where we can see that certain electric motors use magnetic fields to rotate the rotor which allows current to run through a wire. Magnetic fields do superimpose (add up) which we also see in electric fields.

5/7 Magnetic forces and fields

Lab Day 5/7/15 : Magnetic forces and fields

Purpose: We look at magnetic fields due to magnets and also due to moving charges. Today's experiments will analyze the magnetic force that comes from a moving charge and the magnetic field in which relates to the magnetic forces in electric circuits that have a flow of current.  

Magnet and Magnetic field
We began looking at magnetic fields around a magnet that has a north and south pole. The magnetic field direction is determined to go from the north to the south creating field lines similar to that of electric fields. The picture displayed shows the magnetic field lines that appeared by adding iron fillings.  By using a compass, we also determined the direction of the north pole by moving it around a magnet to find the direction of the magnetic field attractions and it was as expected pointing away from the north toward the south pole. The magnetic field lines represent the interactions of things magnetically where we find a magnetic equivalent to Gauss's law. 
Magnetic Field Lines using a Compass 
Next, we redefined electric flux into magnetic flux where we created surfaces on the magnetic field lines created by the magnet to find the net magnetic flux. Three different surfaces were defined: one that included one pole, one that include both poles, and one that include no poles. The results showed that the magnetic flux is equal to the magnetic field lines in and the magnetic field lines out. A net flux was calculated when there is one pole and no net flux was calculated when the surface contained two poles. Therefore, the magnetic flux using Gauss's law allowed us to identify the magnetic flux to be equal to zero.   
U-shaped magnet
We were able to look at the u-shaped magnet which showed that a magnet always consist of two poles where this is just a regular magnet bent. Even if we break it apart, the magnet still has a north and a south pole that creates magnet fields.

Next, we looked at the magnetic field on a moving charge using an oscilloscope. We found that an electric force is acting upon the particle shown on the screen in which the force will always be perpendicular to the moving charge particle and the magnetic field.
As a result we saw that as the north pole of the magnet is brought perpendicular to the charged particle, it moved to the left, and when we flipped the magnet to the opposite south pole, the particle moved in the opposite direction. When the magnet(north side) was brought from the right parallel to the charged particle it moved down and opposite when the poles were switched (south). This shows how the force acting on the particle is always perpendicular of the magnetic field caused by the magnet.

The units of magnetic field was found which is also known as Teslas.
By using the right hand rule, we learned to find the direction of the force by using the thumb as a force vector, index as a velocity vector, and middle as the magnetic field. The force was found using the cross product and Lorentz force as seen in the calculations in the picture below.

We are also able to use the centripetal force and the magnetic force to find the radius for our calculation of angular frequency seen below.

The results using angular frequency was used to calculate the magnetic field.


In this setup we have a magnet that interferes our circuit wire above and when we turn the switch on we observe the wire moving which shows that there is a force due to the magnet in the wire.
It is seen that the force is the cross product of the current times the length with the magnetic field. This is similar to when we are looking at a moving charged particle and its magnetic field. The right hand rule allows us to find the direction the wire would move by using the index finger to identify the current. 

Magnetic Force on a Current Loop


In our current loop, when the magnetic field is into the board, we see that there is no net torque and the loop will not move as the forces cancel out. when we have a magnetic field going left to right with a clockwise current the left side of the wire will have a force going in and the right side will have a force going out which causes it to rotate. The top and bottom has a force of zero because the current is parallel to the magnetic field. Based on this we can see that there would be a movement where our group predicted that the loop caused by the magnet would spin counterclockwise and continue spinning, however our predictions were wrong because the loop spun 90 degrees and then stopped. This was due to the the force going back at 90 degrees position because of torque.


Magnetic Forces on a Semicircuclar wire
We calculated the net force on a semicircular segment of current-carrying wire in a uniform magnetic field. This part showed that the magnetic field is going upward in the z axis. The equation we derived for the net force due to the magnetic field in the whiteboard below. 

We broke the wire into 15 segments to perform a numerical calculation of the net force using excel. The current, magnetic field, and the length was identified. The angle theta was changing in multiples of 12 of to the 15th segment.
F=IrBsintheta

Conclusion:
We were able to analyze magnetic fields due to magnets and found that a wire carrying a current can be affected by a magnetic field. When this happens, we can use the cross product and torque to find the magnetic force on a wire with a current and a charged particle. These two concepts are useful when looking at the effects of a magnetic field on wires and charges.